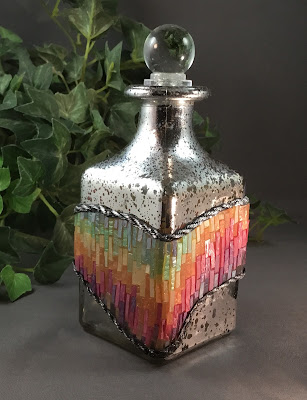
Inlaid Polymer Tiles in Rainbow Design
( A tutorial on how these tiles were made, is in the preceding post.)
This bottle is the first inlaid tile piece I made that I am really happy with. It is fiddly work but I think it is well worth the effort.
~~~~~~~~~~~~~~~~~~~~~~~~~~~
I cut curved shapes from a rainbow design to test size and shape on the bottle. I knew this project was going to be a lot of work and I didn't want to begin without having a plan. You know the old saying, "If you fail to plan, you are planning to fail". ^^
These are the colors I chose that would be closest to the rainbow design. (How the tiles were made is explained in the preceding tutorial, Inlaid Tiles)
Using the patterns, I cut out shapes from white translucent clay that was rolled on #5 on my pasta machine and arranged them on the bottle.
This is the beginning of the tile adding process.
The tiles range from 1/8" to 5/8" in length and 16" to 1/8" in width.
In this video, you can see the bottle all the way around.


A good to read blog with precise and necesary details into it. Really enjoyed complete reading and grabing valuable information inside. Even the language is simply and offers easy to read manner approach. Thank you for sharing such an important information.
ReplyDeleteKato Polymer Clay Tools
Great post. I was once checking constantly this weblog and I'm impressed! Extremely useful information specially the closing part. I maintain such information much. I was once seeking this specific information for a very long time. Many thanks and best of luck.
ReplyDeleteKato Polyclay