Tuesday, January 22, 2019

Inlaid Tiles


 Inlaid Tile Jar


Tile work closeup.


I am finally getting back to work after the long holidays. These inlaid tiles have been on my mind and I have been making them off and on over the last month. So far, I am less then thrilled with what I have come up with but I think there are possibilities for future projects if I keep at it.
~~~~~~~~~~~~~~~~~~~~~~~~~~~~~~~~~~~

 Here are some beautiful pieces of Inlaid Tile work I found on the internet, they are very inspiring.


~~~~~~~~~~~~~~~~~~~~~~

Supplies needed to make the tiles

Translucent White Polymer Clay, (I use Premo)
Eye shadows of assorted colors
Pearlex Powder
Soft Pastels
Scissors
Pasta Machine
Something to add texture
Parchment Paper
(Lots of patience)^^
___________________

First, I conditioned the clay and rolled it out on a very thin setting on my clay machine. Random texture was added with a plastic kitchen scrubber but you could use anything you have around. Then I colored the sheets with the eye shadows and some soft pastels mixed with pearlex.


The clay was then cured and cooled. 
The thin sheets are hard to handle so
 I move them around and bake them on Parchment paper.


The strips were cut in stages as the work is hard on the hands.

Here they are all arranged in a flat drawer, keeping colors together, ready to use in my next project. 


                   This sample was made to see how the cured tiles would adhere to raw translucent clay without using bake and bond to secure them. (too messy for this work).  The seasoned tiles where firmly attached after curing and the colors had become more subdued and blended together.


The tiles show up best when they are arranged on the top surface of a project because they catch the light better. I have that in mind as I look for items to work on next.

Here are a few more beautiful Inlaid (Glass) Tile pieces I found on the internet, this is what I will be trying to accomplish in the future.


And here are some lovely examples of modern glass 
mosaic jewelry, they could easily be made with my polymer clay strips.
 So many things to make. ^^

Hope my work inspires you to try Inlaid Tiles. Have fun!!

Thursday, December 20, 2018

Faux Art Glass Cypriote Lava Vase


These vases were inspired by Tiffany Cypriote Lava vases.


This is a true Cypriote Lava Vase
This vase sold at auction for $50,000.
I can't afford to buy one so I made one with Polymer clay. 


Items you will need to complete this project

Black, Blue & Gold clay (or other dark clay)
(it really dosen't matter what colors you use, these were just my choices.)
Pasta machine or roller
tissue blade
craft knife
sculpting tools
pearlx powder
soft pastels
Gold mica powder or Gold eye shadow
~~~~~~~~~~~~~~~~~~~~~~~~~~~~~~~~~~~~~~~~~~~~~~~~~~~~

Let's get started.
To begin, make a form with thin aluminum foil, the heavy duty foil doesn't work as well for this purpose. You can make it any shape you choose.


(I made this larger vase after the first one and I only have a few pictures,
 but the process is the same as the smaller piece.)


You could also work the clay over an existing vase, but I choose the foil for my first attempt. 


Roll layers of the clay out on the thinnest setting of your pasta machine.


 Cover the foil shape with the clay then work it
 together to smooth it out. Next, form a rim.
 My vase looks a bit "wonky", wonky is what I do best. :)


Add surface detail with your ball tools.
 I guess you could use anything you have to create the desired effects.


Keep working the surface texture detail until you get it the way you want. 


Now it's time to add the colors and pearl powder. Keep in mind, the first layer you add is the only one that will "stick" to the clay, so try to get everything you want on the first application.


Once you have it the way you want, time to cure the clay. I put this vase in a cold oven and set for 275 degrees, baking it for 1 hours and 20 minutes. 

I have heard it said that ovens spike when they first begin to heat up, that's why it is suggested that you preheat your oven before you add your clay. My oven works well on the heat up, never had a problem so I start cold.


When your piece if baked and cooled, it's time to add the "lava".  


Roll your gold clay out on the thinnest setting on your pasta machine.


Drape the clay over your vase and cut away the extra
 to form the lava flow points. 
This is the trickiest part of this project.
 I tried to sculpt the lava to look natural.


Once you get the lava the way you want it, it's time to add the Gold Mica to the gold clay.


Ready to go back in the oven for a second bake. Same as above.
(I cure all my clay at the same temp and time, even tiny thin items.) Easier that way.


It is all done, enjoy your Art Glass Vase!


Monday, December 3, 2018

Polymer Clay Christmas Trees


To make these Christmas Trees, you will need:

Premo White Translucent Clay 
Premo White Clay
Premo Green Clay 
Premo Red Clay
Premo Accents Gold Clay 

Soft pastels (greens & browns)
Parchment Paper  
aluminum foil
Roller or pasta machine
Pattern stamps
Gold mica powder
Sculpty Bake & Bond
Tissue blade & craft knife
Scissors 
~~~~~~~~~~~~~~~~~~~~~~~~~~~~~~~~~~~~~~

First, mold the aluminum foil into the size tree you want to make,
 then cover it with a "base coat" of conditioned clay.


These are the beginning of my two trees, ready to go into the oven. I guess you could make the trees with out curing the base first, but it would be more difficult.


(They were baked at 275 degrees for 1 hour.)

(You don't need the toothpicks, 😉 These Christmas Trees were an experiment and I thought tooth pics would be useful in holding up the "branches", but they weren't needed.)


Most of the stamps I used to create the Gold CT, were from a silicone strip used for fondant, I found it in the bakery section of AC Moore. As you can see, I cut many stamps out of the strip. 


The tree topper was made ahead of time. Use a round stamp. (it could be anything you already have), decorate with gold mica powder. (It was cured to be easier to work with later.)


 The gold tree was assembled in layers, staring at the bottom. Roll out a long thin sheet of conditioned translucent clay, I used #5 on my pasta machine. The clay has to be thick enough to take the stamp but thin enough to have light shine through after curing.

Use the scalloped stamp to make an impression. This is the stamp I used.


Cut the bottom of the scalloped edge first, before adding the mica power, then cut the top. 


Scrunch the top of the strip together to gather the lace.


 Use "bake and bond" as you affix the lace to the tree form. I didn't use a lot of it, just a little will do and only a bit on each row.  On the lower tiers, I added a round of rolled parchment paper between the layers, (see above), the roll was held together with a staple. I also stuffed small bits of P paper where needed to poof out the lace.

 I used quite a bit of rolled up parchment paper in this project. You can remove it easily after curing, nothing seems to stick to parchment paper, love the stuff. 
 Continue on until you reach the top, then affix your pre baked ornament. The balls were made with gold clay and rolled with gold mica powder.  They are hard to keep in place because the extra mica powder makes them slippery, just bake them separately and affix with super glue after curing.

(I baked my tree at 275 degrees for 1 hour.)
~~~~~~~~~~~~~~~~~~~~~~~~~~~~~~~~~~~~~~~

That reminds me, there are a lot of little things that make this technique possible. For one thing, the surface you work on is important. I use a smooth tile, 8"x12". (pictured below)
You need a surface like this to cut around thin pieces of clay, as in this border. It would be very difficult to do if the clay didn't stick down to the surface. After the border is cut, you can lift it carefully with the help of your tissue blade. If it breaks, try making the clay a bit thicker. If you are a beginner, I strongly recommend watching as many Polymer Clay YouTube tutorials as you can, that is the way I learned about handling PC.
~~~~~~~~~~~~~~~~~~~~~~~~~~~~~~~~~~~~~~~~~~~~~~~~~~~~~~~

For the Green Christmas Tree, condition your clay and roll it out on the thickest setting on your pasta machine.  Color with soft pastels as shown.


Use a round cutter to make circles and make cuts with scissors to form the pine needles.


Affix them in rows to the base tree with "Bake & Bond" as shown, no need to puff these branches out. Decorate as desired, "this is the fun part"
😉
~~~~~~~~~~~~~~~~~~~~~~~~~~~~~~~~~~~~~~

Here are the instruction for making the mini candy canes.

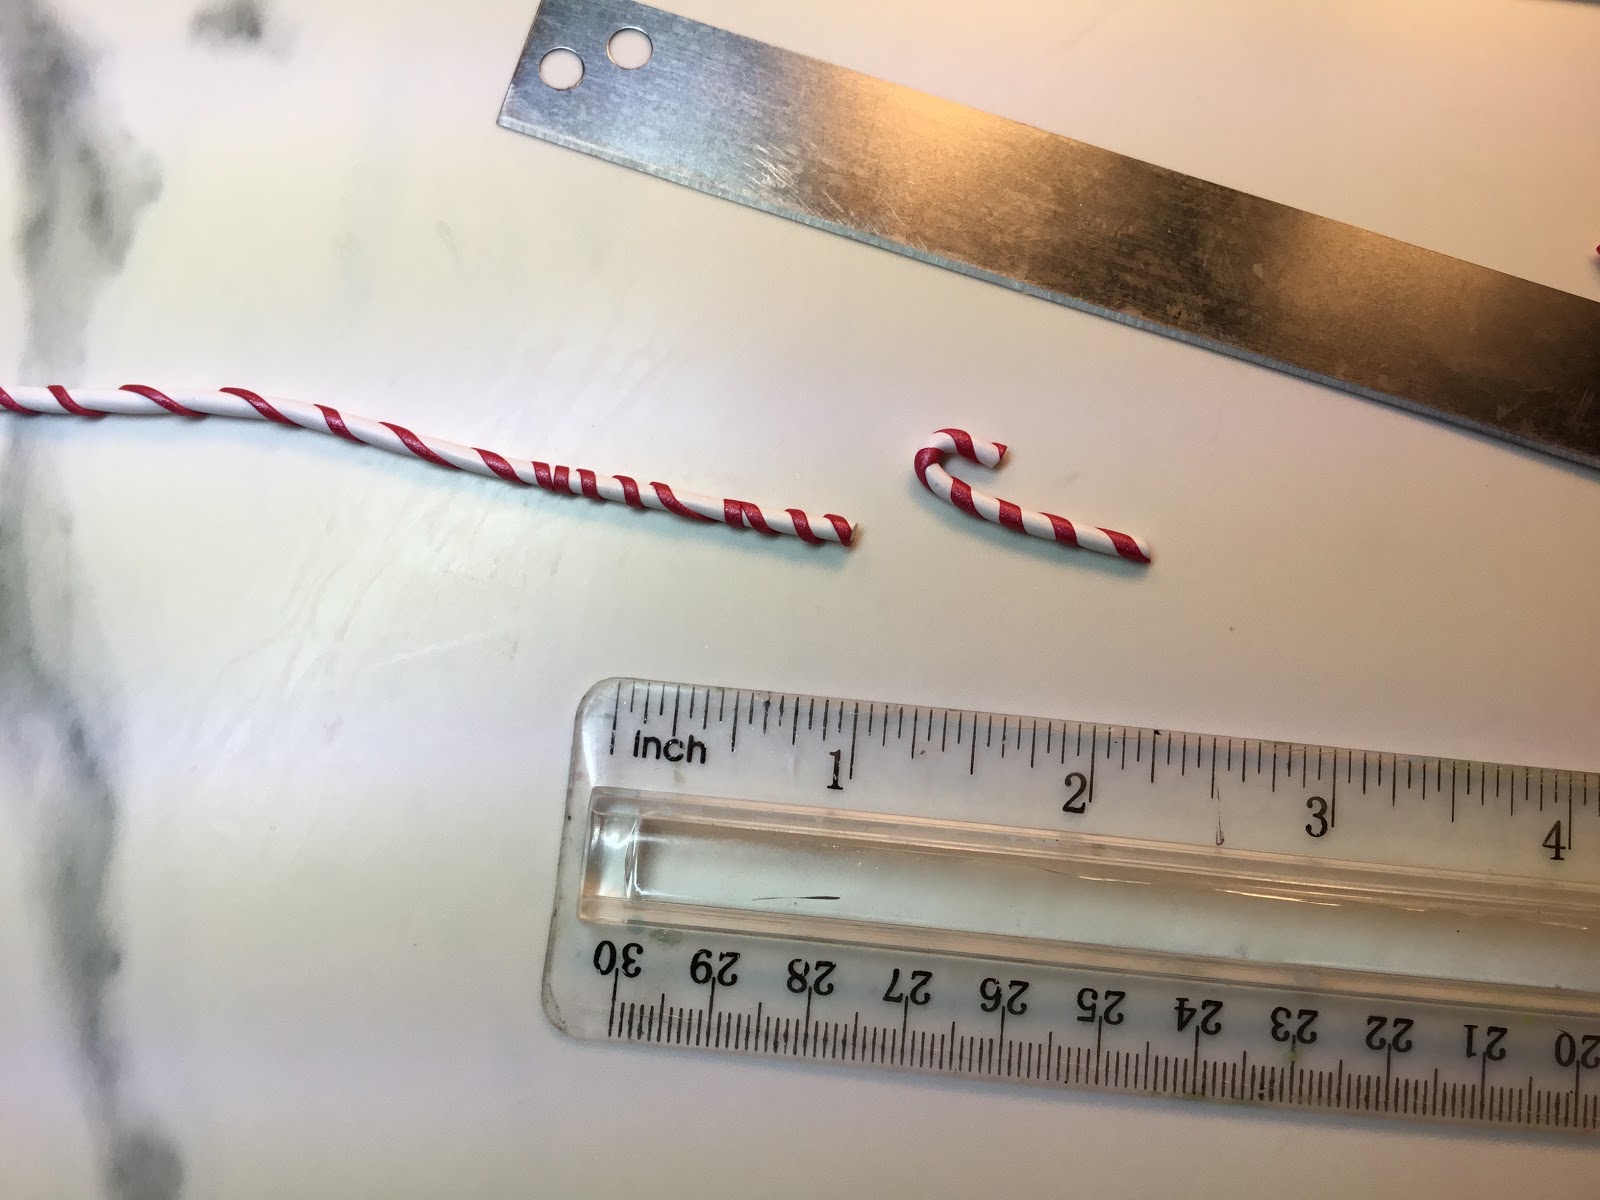
You will need well conditioned red and white clay and an extruder. I used the disks shown here, the tiniest two holes. Extrude and assemble as shown. There is a trick to doing the candy canes to make the red stripe nice and even, I only got good at it when I was working on the last ones, so the first ones are a bit wonky.

Hold the clay strips in position as you roll the white strip into the red one, then lightly roll the two together. (that's when they really start to look like candy canes) 
My candy canes are 1 1/2" long, but you can make them any size and any thickness. 

I think candy canes make great decorations on Christmas items. 
~~~~~~~~~~~~~~~~~~~~~~~~~~~~~~~~~~~ 


That's it, hope this tutorial helps you create your own Polymer Clay Christmas Trees.  If you wish to share your creations, I would love to see a picture. My user name on Facebook is "Evie Campbell" same avatar as the one in my blog.