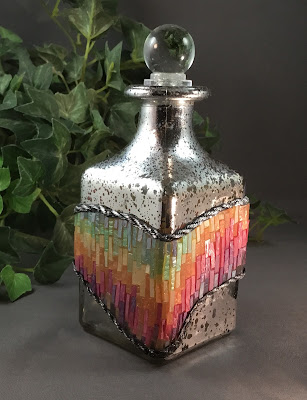
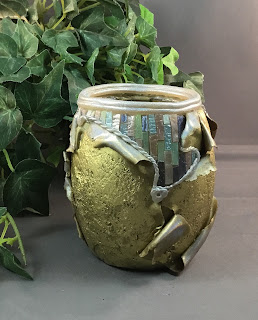
Inlaid Tile Jar
Tile work closeup.
I am finally getting back to work after the long holidays. These inlaid tiles have been on my mind and I have been making them off and on over the last month. So far, I am less then thrilled with what I have come up with but I think there are possibilities for future projects if I keep at it.
~~~~~~~~~~~~~~~~~~~~~~~~~~~~~~~~~~~
Here are some beautiful pieces of Inlaid Tile work I found on the internet, they are very inspiring.
Supplies needed to make the tiles
Translucent White Polymer Clay, (I use Premo)
Eye shadows of assorted colors
Pearlex Powder
Soft Pastels
Scissors
Pasta Machine
Something to add texture
Parchment Paper
(Lots of patience)^^
___________________
First, I conditioned the clay and rolled it out on a very thin setting on my clay machine. Random texture was added with a plastic kitchen scrubber but you could use anything you have around. Then I colored the sheets with the eye shadows and some soft pastels mixed with pearlex.
The clay was then cured and cooled.
The thin sheets are hard to handle so
I move them around and bake them on Parchment paper.
The strips were cut in stages as the work is hard on the hands.
Here they are all arranged in a flat drawer, keeping colors together, ready to use in my next project.
This sample was made to see how the cured tiles would adhere to
raw translucent clay without using bake and bond to secure them. (too
messy for this work). The seasoned tiles where firmly attached after
curing and the colors had become more subdued and blended together.
The tiles show up best when they are arranged on the top surface of a project because they catch the light better. I have that in mind as I look for items to work on next.
Here are a few more beautiful Inlaid (Glass) Tile pieces I found on the internet, this is what I will be trying to accomplish in the future.
And here are some lovely examples of modern glass
mosaic jewelry, they could easily be made with my polymer clay strips.
So many things to make. ^^
Hope my work inspires you to try Inlaid Tiles. Have fun!!


